
let’s build a small western-style toolchest. there are many ways to do this and most of them involve complex joinery – usually dovetails and mortise-and-tenons. or metal fasteners. this one is very traditional-looking and doesn’t use any of those. it’s held together with long dowels and can be made completely from solid-wood or use a few pieces of plywood to save on cost and simplify a few of the components – up to you at each stage.
before we get going, there is a set of diagrams that accompanies these step-by-step instructions. if you click here, you can download them and they’re completely free. all i ask is that, if you share them, you don’t just send the file but link these instructions, too. yes, someone can build the project from only the diagrams but why bother to try to figure it all out when you don’t have to? i don’t mind making this stuff completely free for my students and anyone else taking the time to read. i’m a teacher, after all. i make my living teaching, not making woodworking plans. that’s not to say nobody should sell plans. just that i don’t. yes, i might be able to make a few bucks. but it would be a few bucks and it’s truly not worth that to me to keep them from anyone who might want to use them and doesn’t have the money to invest. of course, if you really want to send me money, you’re more than welcome to pass along a few dollars. but it’s certainly not necessary and you can take these instructions and plans, along with all my others, and use them freely – most of the reason i do that is because i have been asked by other teachers if they can use my plans in their classes and, of course, i think that’s a great idea. we have so many people teaching woodworking now who don’t have the design background and skills, only the desire to impart basic construction knowledge. and i want to make it as easy for them to do it as possible.
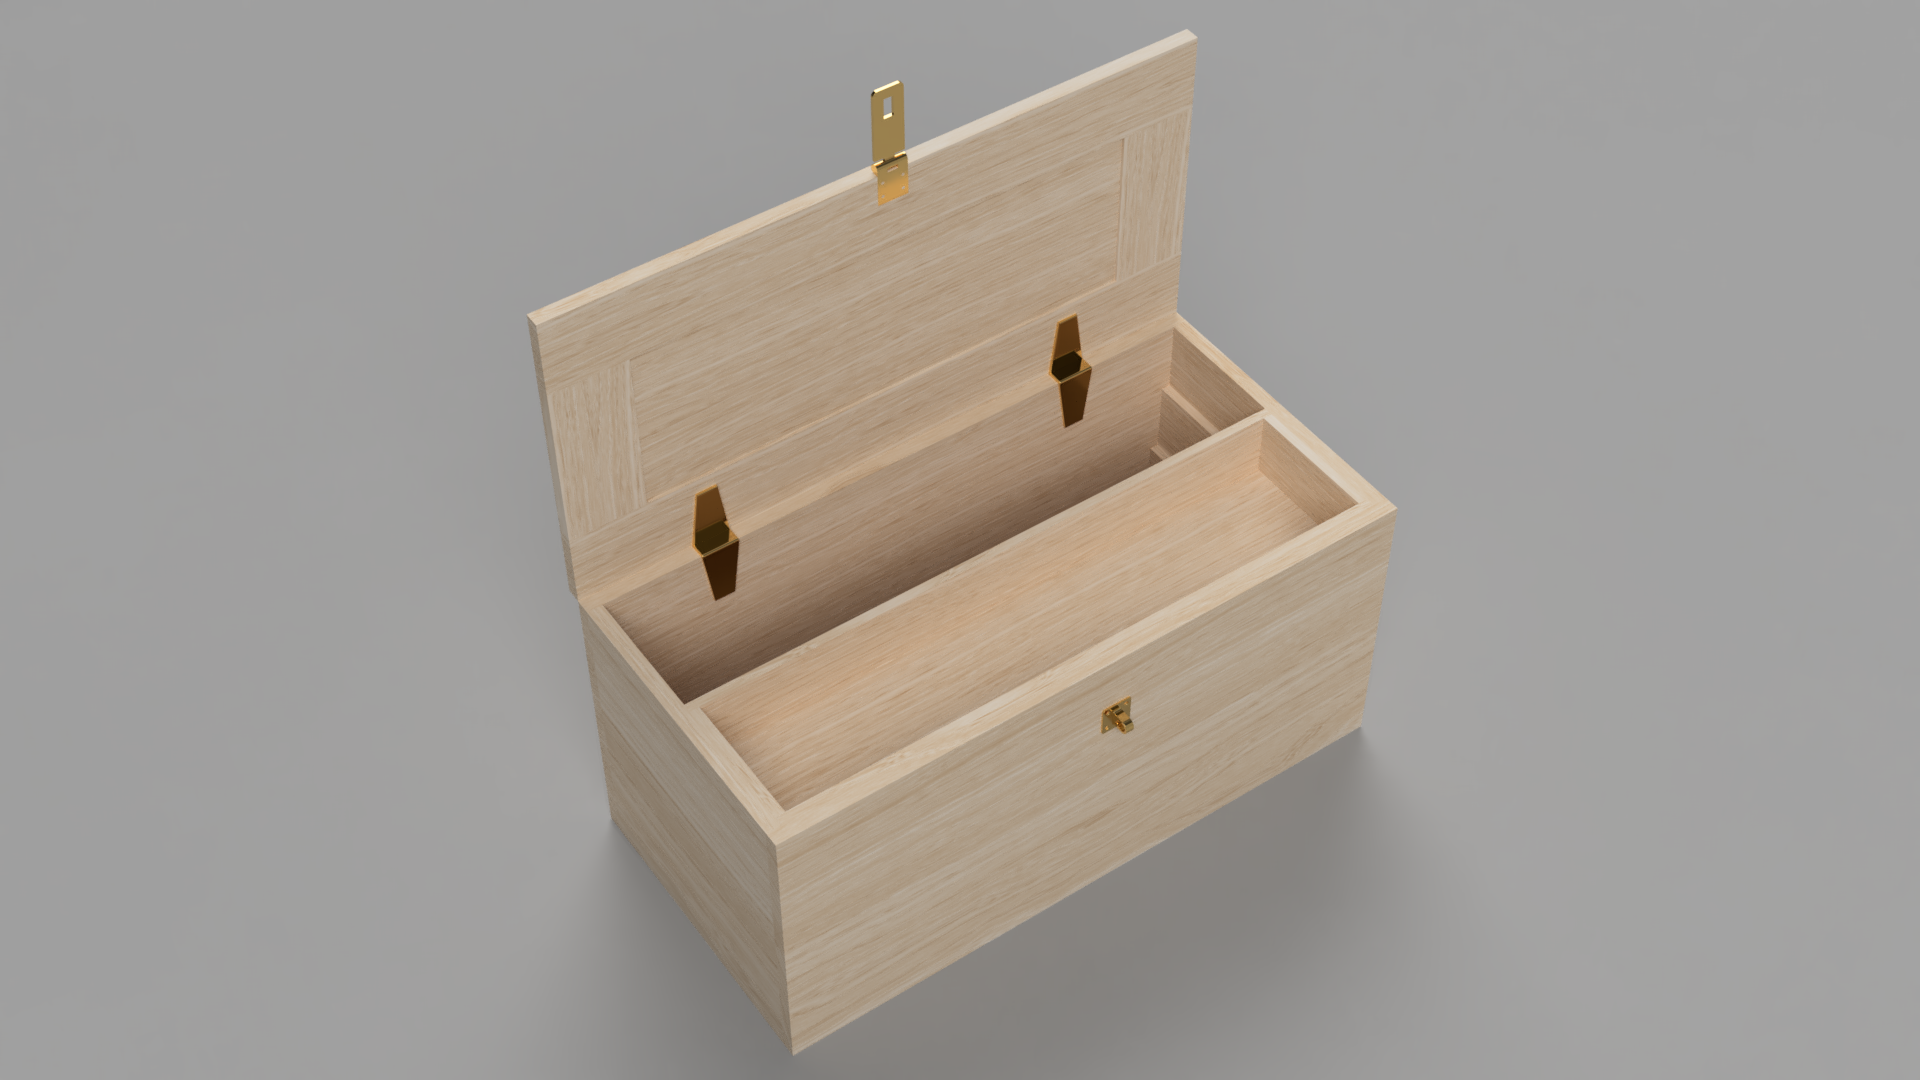
in terms of materials, let’s talk about metal. you’ll need two strap-hinges with an offset as thick as the back piece. if you use my dimensions, this is 20mm thick so they need to be 20mm-offset strap hinges. i recommend a hinge-length of about 200mm and a width about 50mm but you can use whatever is available. you’ll also want some sort of a closing fastener. i’ve showed it here with a locking hasp but you can use anything you like. if you use one of these, you’ll need to carve a little recess (mortise) in the top to house it and attach the other component to the front. measure carefully. i’m not going to prescribe specific hardware. use your judgment. i’m sure it’ll be great whatever you use. if you don’t want to lock it, you can ignore that completely and stick to hinges. i like the look of a traditional folding-hasp close and the brass is beautiful so that’s what i use. it’s not necessary. you can get a gate-fastener at your hardware store for five bucks and it’ll work fine.
now we need to think about wood. try not to think too hard about it. you can make this from whatever wood you like. i can think of some that would be truly awful for it – white pine is simply too soft for most construction needs unless you’re framing a building because when it’s thin it bends and has little strength along its length. but most things are totally fine. if you’re on a serious budget, something like spruce or southern-yellow-pine would be ok. if you want it to look nice, you can use cherry, walnut, oak or, my personal favorite, hard-maple. it’s a toolchest. there are no rules about this.
the other thing about wood selection is that you probably want to decide what you’re going to finish it with. i think you should use shellac. why? because i think that’s pretty-much what all projects should be finished with. it’s cheap, fast, beautiful and easy. but you can finish it with anything. if you want it to have more color, use milk-paint. if you’re going to milk-paint it, that might mean you can use a cheaper wood because you’re not going to see it – even if you don’t like the look of poplar (which i honestly don’t mind that much but it’s definitely not my fav), you can use it under milk-paint and it’s far cheaper than cherry in most places. the other option is dye. if you want it to be a beautiful almost-black color with some grain showing through, pick any wood species you like then dye the pieces with sumi/india/asian-calligraphy ink. a caution about dye, though. it doesn’t protect the wood. once it’s dyed and dried (i know, i’m a poet and definitely realized after my first few books got published) you still need a protective finish on the wood. again i say shellac. but you can use something else if you like – polyurethane works as does varnish. but i strongly believe nobody has that kind of time and shouldn’t have to put up with the awful smell.
one more note on finishing. when should you finish? contrary to the obvious answer, don’t finish at the end. finish before you assemble the parts. first, prepare things so they’re flat and smooth and cut your joinery. then sand them. then finish. now assemble. the easiest way to finish an inside corner? before it’s inside anything or a corner. how do you keep the finish out of the holes and grooves? tape works. or you can ignore it and just stick your drill/chisel back in there to clean it after. i suggest tape. it’s hard to get finish off and glue to stick later. but it’s not my chest (i’m told that’s what she said) and you’re welcome to do anything you like. you can fill dowel-holes with cotton balls, by the way. i’ve also seen people use earplugs. i just tape over them completely. the area around the mouth of the dowel-holes isn’t going to be seen so it doesn’t need to be finished. just put a strip of painter’s-tape along the entire part that’s going to be covered by the mating board and you can save yourself all the trouble of filling the holes.
a final thought on materials. the panels of the top, bottom and tray-bottoms can be either solid-wood or plywood. the design will work with either. if they’re solid, you have to make sure you only glue them in the centers to allow for expansion and contraction of the panels with the changing seasons. if they’re plywood, glue them in the grooves and move on with your life. again, up to you. there’s no reason to worry about it either way. the same dimensions and procedures work regardless of which direction you decide to walk in.
as for finishing, on outside parts you’ll want to break the edges with a block-plane. these edges, if you’ve done your job well, will be sharp. soft hands will touch them. just remember to do this at the end. that’s not really part of the construction process. you should do it just before you apply finish. it doesn’t have to be round. just a few passes with a plane will leave the edges visually-sharp and precise without cutting your children’s fingers when they explore. or yours. cause nobody likes bleeding fingers.
with all that out of the way, i think you’ll find this box surprisingly simple to build. let’s begin with making wide boards. you can certainly use a very wide piece of wood to get the sides, front and back from. the board will need to have a nominal-yield at least 400mm wide. as that’s not generally a cheap or easily-sourced thing, i’m assuming you’re going to glue two boards together to make this and that gives a nice decorative touch to it with a thin dividing line in the grain at the halfway point, anyway. if you want an even-more-obvious break, you can add a light chamfer to the mating-edges on the outside of each face to accentuate the dividing line as a design feature. i think it’s fine just to have it even all the way around the box. it shows precision and deliberate choice rather than simply making panels and not caring where the divisions go around corners.
so the first step is to cut these to approximate length. you should leave them a little long and thick when gluing up because you’ll need to smooth and trim later if things aren’t completely-accurate. which they might not be. you want a front and a back panel that are made from two 860x200mm boards and two sides with two 380x200mm boards each. these pieces are all 20mm thick. i’m assuming unless i say specifically (which i won’t) the grain will be running in the long direction on these boards.
before you glue them together, take a look at the diagrams and see where the grooves will be cut. it’s easier to cut the stopped-grooves on the front and back panels before you glue them together. so do that. you can cut the long grooves on the front, back and sides before or after glueup – the timing doesn’t matter for those because they don’t change in difficulty. the rails that will sit against the side panels can be glued together at this point or later. it doesn’t really matter. i’d do it now while the glue and clamps are out but as long as you get them done before they have to be inserted it’s all fine.
at this point, you need to decide whether you want to make your bottom panel from plywood or solid stock. if you need solid stock, glue your panel the same way as the other components. if plywood, cut out the piece. it should be 840x200mm. i’ve showed it here as 20mm thick (like 20mm plywood) but you will need to adjust your grooves to match the material you have. remember, don’t worry about being accurate to the plans if your materials vary. always make things fit reality, not theory.
with your panels glued together, now you can assemble the bottom. you’ll need to drill the holes for the dowels. i’ve given specific placing instructions for them but realistically the point is to drill the holes in the centers of the side edges and make sure they match in the vertical direction. you can do this with a ruler or a combination-square. you can do this by drilling one set then marking the second to match. as long as they’re not too close to the ends or edges or grooves, they’ll never be seen. the depths are approximate but they’ll be good guidelines to make strong joints. don’t add lots of extra dowels. doubling the number of dowels doesn’t add strength. you’re just weakening the sides. this is plenty of dowels already.
my recommendation is this – glue the thing together as two capital-l-shaped assemblies then slide in the bottom and box-rails and glue the last two mating-faces. you can definitely do it all-at-once. but there’s no need to put that much pressure on yourself. just glue and check it’s square and it will all come together fine. if you’re using plywood, glue the bottom panel in. if you’re not using plywood, glue it only at the center of the ends and put no glue along the sides. make sure you leave enough space in those grooves for the panel to expand and contract. with plywood, you can make it tight. with solid wood, you need to pay attention. if you’re making this in the winter, you might need a couple of extra millimeters. at the height of summer, you can probably make it fit tightly and it’ll be ok. wood expands and contracts across its grain and not noticeable along its grain. this bottom will expand in the 400mm direction, not the 840mm direction. the base as a whole will expand and contract vertically and all the pieces are moving the same amount in the same direction so you don’t need to worry about it at all.
now you can move on to making the top – probably while the glue dries on the bottom. the top is even easier. it’s frame-and-panel like the bottom but it’s a single-layer frame. cut the four pieces, make your grooves, drill your dowel-holes and slide it all together. if you use plywood for the panel, you can glue it in – this makes the whole thing significantly stronger. plywood here really is the best material and you won’t see the edges. it really will look the same as a solid panel except you’ll get extra strength. if you want to use solid-wood, though, you have to be careful in the same way as with the bottom. leave yourself enough room for expansion and contraction depending on what season you’re making this in. you can glue it in the center of the short edges but nowhere else. with that done, slide it all together with glue and stick it in the clamps.
you’ve now made the chest. let’s make the sliding trays that go in it. these are made exactly the same as the base of the chest but you don’t need to glue panels together to make it happen or cut extra grooves for rails. prepare your four sides, cut your grooves, drill your holes for dowels and put the whole thing together. yes, you’ll need to allow space for expansion and contraction of the bottoms in their grooves if you are using solid-wood but plywood works just as well here as in the other components. up to you. if plywood, glue the bottoms in their grooves. if solid-wood, glue them in the middles of the short edges and nowhere else.
how do the trays work? the bottom one is slightly narrower. it fits in the lower rail’s cavity. the top slides on top in the wider space left at the top of the rail. they shouldn’t prevent each other from sliding but they should touch each other. and the top tray should touch the lid when it closes. they should run firmly against the sides. a tight fit can be a beautiful thing. if it’s loose, it will rack. if it’s too short, it will rattle when you move the chest. if they don’t move smoothly enough, wax the sides. they should slide easily but not move out of place too much when the chest is shifted. no, it’s not a portable toolbox. it’s too big and heavy for that. but it’s not going to stay in a single place its whole life so it’s useful to remember it’s not a piece of stationary furniture.
now you can attach your hardware with screws. don’t forget to predrill. this isn’t driving deck screws outdoors through construction lumber. these are thin pieces and they’ll split. it’s worth the few seconds. you’ve put in a lot of work already and it would be a shame to destroy it by trying to take shortcuts, don’t you think?
you’re done. if you’ve taken my advice on finishing, you’ve already sanded and finished before you put it together with glue. if you didn’t, you have some finishing to do. either way, you’re finished with the construction process and you’ve very quickly and easily built yourself a beautiful little toolchest that will last you years. you should be proud of yourself. thanks for following along here.
if you missed it earlier, here’s a link to the printable diagrams with measurements.