sometimes you just want things to be dark. and i don’t mean the middle of the night. we’re talking about wood —which we often do here. whether that means midnight-black or vague gray or something between, most wood doesn’t do neutral black tones straight off the tree and wood almost universally ages to medium-brown. of course, you can always paint the surface. but what fun would that be? (plenty, i know, but if you were just looking for me to tell you to paint the surface, you probably wouldn’t be reading an article.) the key is usually you want the grain to be visible (at least a little) on the wood but to get a neutral-gray tone, potentially most of the way to black. there are a few ways to achieve this but they really come down to three basic techniques and they’re realistically quite different both in result and application. let’s take a look — torching, staining, dying. i know the last two are realistically quite similar but i’m going to differentiate between the things that are sold as stains and those that are sold as … other things.
there ain’t smoke without … finish?
there is an ancient technique in east-asia that goes by many names involving burning the surface of wood to protect it from the elements (by elements we also mean insects but we’re really talking about the brutal winds of the japanese and korean coastline and mountains that strip moisture and crack wood on contact — not dissimilar to what you’d experience in maine or nova scotia in the middle of winter but without the necessity of low temperature so it happens all year). none of the names is realistically all that historically-standardized, not becuase they’re not old but because it’s been known as so many different things from location to location — and language to language, as it’s not just a japanese technique but was used all across the korean peninsula, parts of southeast and even northeast china, vietnam, cambodia and you can even see early examples of similar techniques used in indonesia, thailand and the philippines. but like many things when we’re talking about traditional woodworking, the japanese were one of many to use a technique but the ones to absolutely perfect and refine it — not dissimilar to the way japanese business has done much the same for steel production, cars, stereo equipment, semiconductors, etc. few of those things were invented in japan but nobody ever got fired for recommending a toyota or sony.
the technique we’re talking about here is probably best-known in the western woodworking community as yakisugi (焼杉) — if you’ve heard it called “shou sugi ban”, this is because someone read 焼杉板 and didn’t understand japanese pronunciation rules and the last character just means “piece of wood” or “board”. this is literally “torched cypress” — yaki means “apply fire to” and sugi is the specific name for cryptomeria japonica, otherwise known as japanese cypress, not quite the same tree you see in north america but definitely related. the interesting thing about this is that this isn’t so much a description of its existence as what it looks like. evergreens are common in parts of japan but not the vast forests of north american pine and fir — they’re striking especially if you come from the far-more-populated southern sections (yes, especially in historic times before tokyo/edo and kyoto/osaka were quite as population-dominant). how do you describe that fuzzy tree to someone who’s used to deciduous leaves? well, it looks hairy. so they take the symbols for hair and tree and put them together (look at the character 杉 and you’ll get the picture, tree on the left and hair on the right) and you get “hair tree” — sugi. in the parts of the country where this technique was first really used en-masse, the construction lumber of choice was cypress, much like yellow pine is used in much of the eastern united states today. was it the best material for building houses? absolutely not. was it available, cheap and easy to work? definitely. so they built houses from this relatively-soft, not-particularly-strong wood. and it rotted. like crazy. had to do something about that, of course. we’re not barbarians. we want our houses to stand up to the elements and fight off the bugs (if not the big-bad wolf). there were a few potential options and they were all used — including thick finishes made from tree resin, which i’ll talk about some other time if people are interested. but the simplest way to do it was to strip the wood of its active organic components, turning it into a near-charcoal inert object, at least on its exposed faces. i like to think this property was discovered by accident someday when a candle got knocked over and the walls of a house got burned and instead of it being a disaster, it was the strongest house in the village. but nobody knows where it really started.
how do you do it? simple. get your wood ready for assembly, apply fire, brush off the ash — done. i know. you wanted a complex step-by-step. there are various ways this can be done. traditionally, it was done by making a fire (think campfire) and slowly feeding lumber through it before it was put up as cladding on a house. today, we usually take a more bring-the-fire-to-the-furniture approach. my preferred method for large pieces is a mapp/propane torch with a large mouth and high-intensity flame. this will do the sides of a table or cabinet in a matter of minutes. for smaller things, a blowtorch (yes, the kind you use for plumbing is fine) will get the job done without any difficulty. if you’re making something absolutely tiny, you could try to do it with a handheld barbecue lighter but i wouldn’t recommend it and you’ll probably get high from the fumes before you really have much of an impact on the surface.
there are a few things you want to keep in mind as you do it. keep moving. you want an even texture and coloration. stay in one place too long and you’ll darken just that area or potentially actually set the whole piece on fire. which brings us to the next thing. do this outside with nothing else nearby. it’s dangerous. all woodworking is inherently dangerous but this? this is more than inherently dangerous. it’s playing with fire. literally. you can get burned. you can set things on fire. you might destroy the furniture, your house and your body. so take precautions. if this sounds like your grandmother talking, that’s good. i’m a teacher and the last thing i want is to have students come back and say “sato-sensei told me to light my table on fire and i ended up in emergency with second-degree burns” or something. be safe. if you’re irresponsible, drunk, high or a pyromaniac, this might not be a good finishing technique for you. if you’re a sensible adult with a reasonable degree of self-preservation and forethought, it’ll probably be ok. but don’t say i didn’t warn you. the key, though, is to do it quickly in light, controlled passes. there’s no reason you have to get it all done at once. you can apply the technique to the piece two or three times — i have certainly had better results doing it lightly multiple times than trying to get the whole piece to its charcoal endstate in a single shot without lighting the driveway on fire in the process. plus it’s fast. the whole thing won’t take you very long unless you’re torching a table for a medieval village feast. in which case put on a podcast and schedule a day of fun-with-flame. but if it’s a reasonable piece of furniture we’re talking minutes rather than hours.
when you get a coat finished, don’t be stupid. a lot of that stuff is going to be flaky and rough. i’ve seen people encase the whole thing in epoxy. it looks … scarily awful. the least you should do is take a strong wire brush and wipe it off. i actually use a wire-wheel on a drill and strip the whole thing back. i do this between treatments if i’m doing more than one treatment. and this brings up another issue of technique — you might not be looking for all-the-way-to-charcoal-like-my-house-was-on-fire as an end result. if all you want is medium-gray, one light pass could do it for you. but use your aesthetic judgment. the color will be relatively stable once it’s brushed. this color isn’t going to darken with age the way natural wood does (i’m looking at you, cherry, my love) — the caveat is it will darken a little when you apply finish, especially if it’s oil-based. but not that much. if you like the color, you’re done. if you want closer to black, light the torch again and give it another hit. there’s no limit to how many times you can do it but, practically speaking, four or five coats and you’ll be as dark as it’s going to go because it’ll look like the depths of an unlucky kitten’s fur at midnight and you’ll just be kicking a horse of the pre-zombie variety.
when it’s done and you’ve got it brushed, people will tell you that’s the traditional way to leave it. and if it’s the outside of a house in a village about to be hit by a winter storm they’re absolutely correct. but if it’s a piece of furniture that’s going to live in someone’s house, that charcoal finish is going to rub off and get on everything. got children? believe me, they’re going to nuzzle that thing like you wouldn’t believe and it’ll get everywhere. and don’t even think about putting your feet up on the table with white socks — your tabi will look rather desperate after a few minutes of that. what’s the traditional coating? the same thing that’s been used to coat everything from dishes to dolls to tools in japan since the beginning of recorded time — lacquer. it’s fast, easy and it sprays like a puppy that’s excited to see you. but you can realistically use any finish you like. i use lacquer or shellac (please, blonde and dewaxed because the wax will get in the exposed soft intergrain structure and give you a very odd texture — try it if you like but i’m trying to save you from some visual embarrassment here). you can do poly or varnish. if you want to deepen the color and grain, you can apply oil but that’s not a surface finish for something like this. it won’t give you the protective surface you want — and that your clothing needs. so if you oil it, lacquer or varnish over it. it doesn’t need ten coats. but one is never enough unless you’re truly using too much. don’t use too much. be gentle and the piece will reward you. sand before your first coat. sand between coats. buff with steel wool after your last coat. and if you’re using anything other than shellac, make damned sure you wipe the dust off between coats. it’s even more important with this technique than others because you’re going to get little black specs of dust, not just finish particles. it’ll be obvious if you’re not careful. so be careful.
stain
stain loosely comes in two varieties — liquid and gel. they work the same way. you get the color you want, apply it, let it soak in, wipe it off. got that? it’s the simplest finish to apply. but it requires a few pieces of knowledge to do it well.
one is you’re not likely to get the result you want with the first coat. it usually requires at least a couple to build up some serious depth. the instructions won’t tell you that. but i will. don’t expect it to be dark enough or rich enough or deep enough with one coat. assume, if you’re building fine furniture, you’ll want to do two or three coats separated by at least a few hours (if not days) to fully dry. don’t put a second wet coat on before the first coat is dry after you wipe it off. if you don’t wait, you’ll end up with a rather sticky mess and that’s no fun. the second of these instructional things is about sanding. you don’t need to sand to 320 or 400 when you’re going to apply stain. 150/180 is plenty. but you want it to be smooth and even. after you apply stain, hand-sand (don’t touch that random-orbital unless you want to undo all your hard work) with 220 and 320 then apply your surface finish. and that’s the third piece. don’t assume stain is a finish. it’s a coloring process and the finish will be something else — i like lacquer but you can use shellac or varnish or poly. after the first coat, lightly sand with 320/400. do this between coats every time — and, again, if it’s not shellac, make sure you clean the surface after sanding before the next coat. buff the final coat with steel wool and you’re done. the feel is actually the texture of the finish, not the texture of the wood under the stain so don’t worry you didn’t surface it as high before you started. nobody will notice and the rougher wood will soak up the stain better and give you a more even color.
be careful with softwoods and stains. and oak. you might need a prestain or priming stain. i don’t stain enough to give you all the warnings about this. i actually don’t generally like using commercial stain. i’ve just included it because it’s a frequent question.
and here’s one more piece of advice. the wood you’re using is the wood you’re using. pine doesn’t look like mahogany. oak isn’t cherry. and it’s certainly not ebony. nobody’s going to be fooled. and if you are contemplating asking me how to make doug fir seem like it’s walnut, i’ve got three words for you (and this is certainly not a recommendation) — lysergic acid diethylamide. if you don’t understand, look it up. but that’s about the only way anyone’s going to make that perceptual error and even then it’d have to be a badly-lit room and a particularly awkward pharmaceutical journey. the stain is going to color your wood. it won’t transform it from one species to another. if you don’t like the wood you’re using, i have two other words for you and they always make me smile, though others tend to be wholeheartedly against the whole notion — milk paint. paint is wonderful. i’d sing an aria but you wouldn’t hear it anyway. but i absolutely, passionately adore milk paint accents in pieces. you will, too, i suspect, if you give it a chance. but this is an article on dark, natural-looking finishes so i’ll avoid that tangent and stick it on the list of things to talk about later in walking-away-from-the-curve land.
it’s always a good day to dye
the third option is the one i tend to use most often and generally recommend — why it wasn’t the first option, i’m not sure. but i guess i wanted to get the other ones out of the way. and most of the finishing recommendations there apply here — sand thoroughly, apply color, sand between coats, clean the piece, buff after finishing.
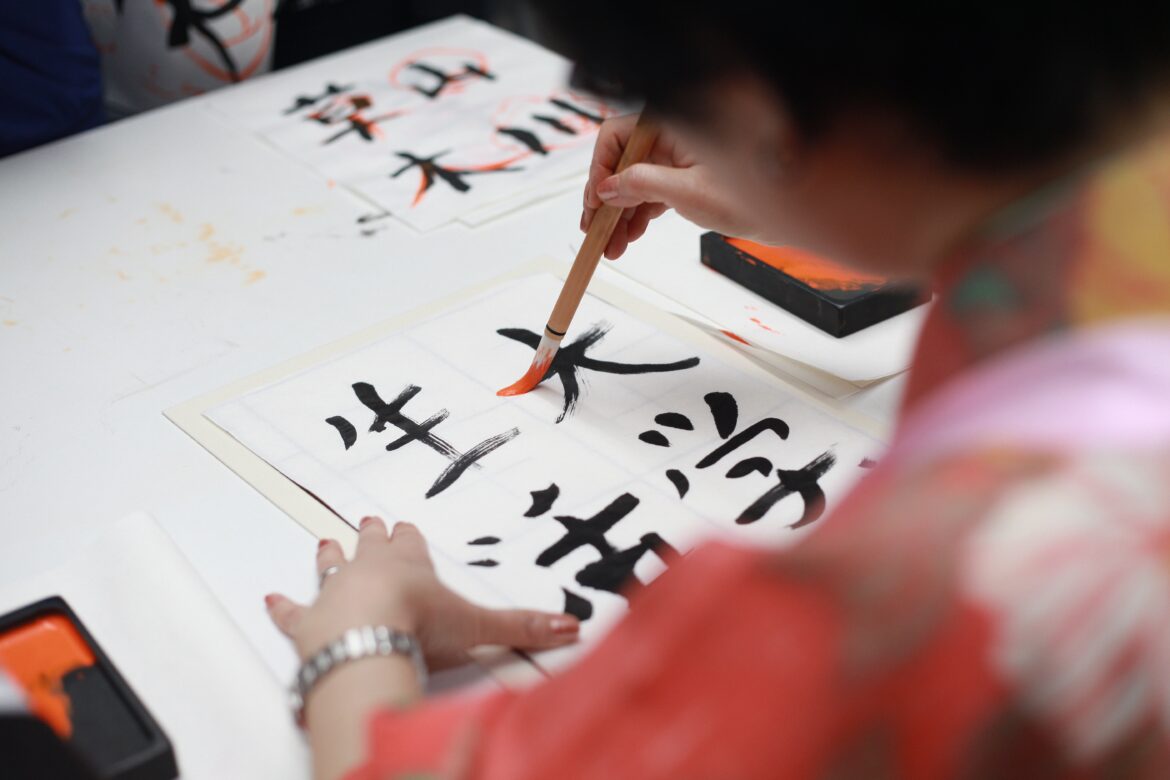
but that’s where the similarity really stops. what we’re talking about is coloring with ink. the first step is to buy some ink. what ink? now that’s an excellent question. do you do calligraphy? it’s my other hobby (at least one of my others — but i have this vague sensation most of my readers don’t have an obsession with brushes and ink and trying to duplicate the styles of ancient scribes in their spare times so you probably don’t have a closet full of different inks to play with the way i do and if that language discussion of where yakisugi came from in the first technique was a little mystifying to you alphabet-reading types, don’t worry — you don’t need to learn to draw hanzi characters to use calligraphic ink to color your wood — though there is a joy in it i can’t describe and would highly recommend, even if you don’t speak the language — visual beauty is linguistically-transcendent and it’s closer to painting than writing but i digress rather a lot here).
what you want is a liquid, water-based ink. you don’t want it in solid form because that’s a messy nightmare to mix up unless you are actually passionate about traditional methods. and this isn’t a traditional finishing method so i invite you to just call bullshit on the whole thing and use premixed ink. feel free to scrape an inkstone and add water if you like. but it’s unnecessary and a whole industry in japan has grown up to produce ink for centuries so we might as well lean on their successes. if you go to any art store, they’ll understand if you ask for “sumi ink”. this also goes by other names but usually they vary in consistency. some other things you’ll hear it called are “charcoal ink”, “india ink” (no it’s not from india but it came to the west through indian trade ports so…) and “ink-wash ink”. what you need to be careful of is that this is not the same thing western pens use. that stuff will not work for this procedure. you can force it to. but it’s not a good place to start and i’d say avoid it.
here’s the other thing you might want to keep in mind. in the west, sumi ink will probably all be black. traditionally, this isn’t the case. if you want your wood to be other colors — red, blue, green, yellow, orange, purple and aquamarine are all traditional colors and that’s not even a complete list but generally the black is the one you’ll want for wood — be my guest. but i’d suggest trying it with black first to get the procedure dialed in and remember light wood darkens with time so other colors will shift to be darker and more brown with time — figure this in for your calculations.
i’ll take a moment here to mention something else about using bright colors on wood. if you’re going to do this, i highly recommend bleaching the wood at least once and perhaps as many as five or six times before you apply color. want the wood to be bright blue? bleach the living fuck out of it and make sure it’s thoroughly dry. even if it’s beech or ash. and you’ll be thankful you did. how do you bleach wood? you can use oxalic acid or potassium permanganate — or, for that matter, household chlorine bleach or hydrogen peroxide. apply to the wood, let it soak in, wait for it to dry, finished. which chemical you use depends on the species and some do better than others — both species and chemicals. this is not a guide to that procedure but i’m happy to explore it with you if you’re really interested. i’ve always found it fascinating but it’s both very smelly and fairly slow. want a really fast result from wood bleaching? here’s my trick — treat it like hair. i mean, cypress is called hair-wood, isn’t it? well, i did some hairdressing courses in college so it’s in the back of my mind, anyway. mix up hair bleach the way you’d use it if you were going to take actual hair as close to white as possible (1:2 with 40vol is good but if you don’t know what that refers to it’s unimportant and you can get a bleach kit from the drugstore and it’ll probably be just fine) but instead of letting it sit for a half hour then washing it out, let it sit for the better part of a day — or even more than a day. realistically let it sit there until it dries. then wash it off. the wood will be much lighter. of course, this is a bit of a hack and people will probably be a bit curious where it came from. and results will vary so use some test pieces if you’re going to try it. but i’m more likely to use this than to go to a chemical supplier and get oxalic acid to bathe my furniture parts in. buyer beware and consider yourself warned this is somewhat experimental. you do it at your own risk but if you’re doing it on a test piece in a well-ventilated area you’ll get some results, for sure. whether they’re the results you want, i can’t predict. but the wood will, indeed, be lighter.
oh. and don’t bleach pine. don’t use pine. just walk away from the pine. there are some great uses for pine — framing houses and building workbenches come to mind along with outdoor furniture — i love pine picnic tables and adirondack chairs. but it’s not going to take well to such treatment and it’s not fit for purpose when it comes to building fine furniture. it’s simply too compressive, too weak and too goddamned ugly.
but enough of the whiteness. you’ve got yourself your sumi ink. it should be about the same consistency as soda — if it looks like coca-cola, you’re doing it right. if it’s not, think it with water until it is. if you have to add water, follow taylor swift’s advice about mixing. shake it off (up?) far more than you think. the ink is water-based but it’s got heavy pigment in it that won’t distribute as quickly as you might imagine at first. this is something you won’t notice until after the dying has been completed, at which point your piece is ruined unless you’re going for tie-dyed rather than uniform darkening. if goth-meets-hippie is your target aesthetic, this is ok. otherwise, shake, shake, shake.
paint it on the surface of the wood and let it soak in. as the wood drinks it, paint on more. you’ll need far more on the endgrain than the faces and edges because wood is like a bundle of straws. that’s fine. there are other possible application methods but this will work. try other stuff if you like. i use a cloth but you can use a brush. don’t use a foam brush cause you’ll get little bits of foam on the wood and want to burn it later. but a good-quality paintbrush is ok. i just find a cloth faster and easier to control. you can in theory spray ink but it’s not worth the bother. apply it like you would shellac or stain and just keep adding very thin coats until you get to the area of color you’re looking for. it takes almost no time to dry once you have the last coat on. you don’t need to wait between coats. like applying linseed oil, just keep going until either the wood won’t hold any more or you get to the color you desire.
then you’re home-free. let’s talk about sanding. before you do this, you should have already sanded to about 180, applied moisture to raise the grain, sanded again with 180, 220 and 320. you can go higher but that’s probably sufficient. then apply the ink. once you’re finished with the ink, lightly sand (by hand) at 320/400 and apply your first coat of finish. again i recommend lacquer or shellac but varnish (if you have an eternity to wait for it to dry) is totally ok and poly is a good protective coating if you’re into that liquid-plastic scene. epoxy as a topcoat is durable but it looks exactly like what it is — thick plastic poured on your furniture. so if you’re down with the petroleum-distillates-on-the-table vibe, be my guest. but my aesthetic sensibilities tell me most people will like lacquer or shellac most. as always, use test pieces. don’t risk your beautiful finished furniture without knowing where you’re going. any finishing techniques you read in a magazine or the internet should be thoroughly tested. for one, we might be idiots. for two, perhaps more relevant, your supplies and shop environment might be vastly different from mine — and it probably is. do this in a shop that’s ten or twenty degrees colder (i’m always freezing so my shop temperature never goes below about 23c — about 78f — and that has a huge impact on finishing — i am used to applying finishes well into “the nineties” and happily do that but i can’t really give you much personal experience about what happens when you do things in the cold because i simply refuse to do cold) and you could have totally different results. different brands of ink? no telling how they’re made and there are some brutally-bad chemical suppliers out there and someone’s bound to hit them eventually. anyway, as with all advice on the internet, do at your own risk. use test pieces. you’re not stupid. if something sounds like you should try it out first, go with that feeling. it’s wise.
finishing thoughts
so you’ve got dark furniture now. the peasants rejoiced. hopefully you do, too. natural wood is awesome. we all got into this because we loved the look of beautiful wood. but sometimes you need an accent color. and sometimes you just need something different in a room. yakisugi or ink-dying is an excellent way to keep the underlying feel and presence of the wood without it being just another medium-brown piece of furniture. it has grain and texture and natural aesthetic sensibilities in a way most paint or thick-opaque-lacquer finishing methods just don’t. it can add a new dimension to your design palette. or it might just make you want to go back to natural wood for your next project. either way is totally fine. taste is a personal decision — i love honey-sweet-rice and i’ve discovered i’m in a distinct minority and i love nearly-black wood furniture, this potentially being just as much an acquired taste. i’ll leave it to you to decide. thanks for reading!